
10 Budget-Friendly DIY Aesthetic Room Ideas You’ll Love
Want to revamp your room without breaking the bank? Look no further! Here are 10 budget-friendly aesthetic room ideas you can easily DIY to create a cozy and stylish space that reflects your personality. From simple decor hacks to creative organization tips, these projects will help you make your room feel fresh and inviting on a budget.
Recycled Jar Planters
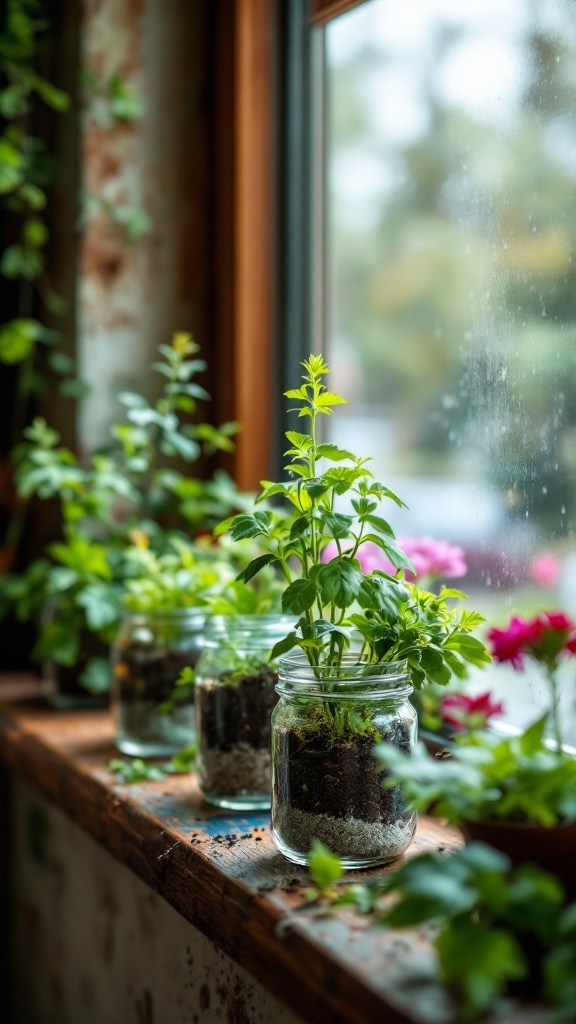
Recycled jar planters are a simple and fun way to add some greenery to your space without spending much. They look great on windowsills and can be customized to fit your style.
In the image, you can see a row of glass jars filled with soil and healthy plants. The jars are clear, allowing you to see the layers of soil, which adds a nice touch. This setting creates a fresh vibe, making your room feel more alive.
Using jars you already have is not only budget-friendly but also eco-friendly. You can plant herbs, succulents, or any small flowers. Just make sure to provide some drainage for the plants by adding small stones at the bottom.
These planters can be a fun DIY project. Get creative by painting the jars or wrapping them in twine for a rustic look. It’s a great way to personalize your space while keeping costs low.
Upcycled Furniture Makeover
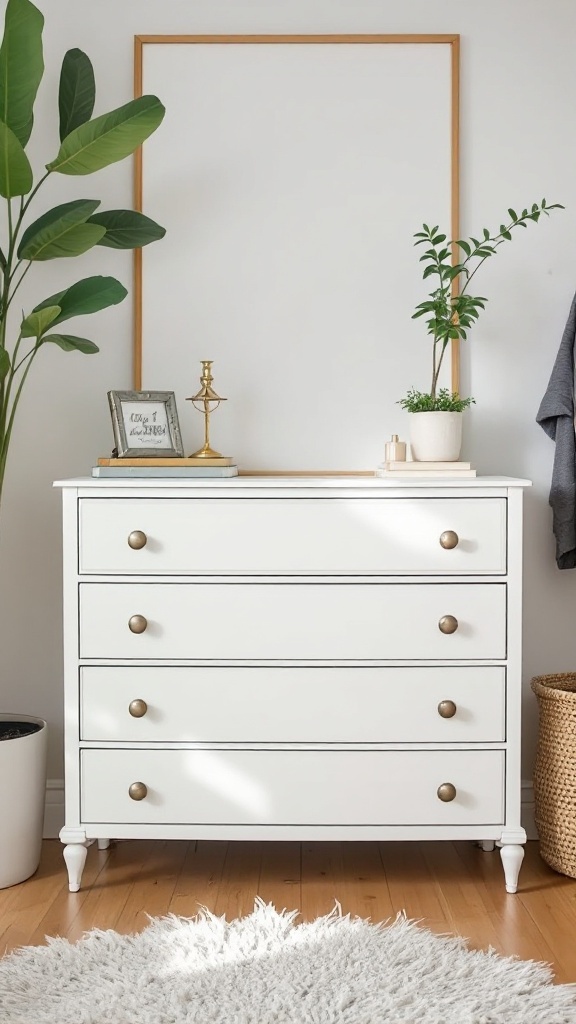
Upcycling furniture is a fantastic way to refresh your space without breaking the bank. This image shows a beautifully transformed dresser that is both stylish and functional. The clean, white finish gives it a modern look, while the gold knobs add a touch of elegance.
The plant and decorative items on top create a warm and inviting atmosphere. You can easily achieve this look by painting an old piece of furniture, swapping out hardware, or adding some greenery. It’s all about turning something ordinary into something special.
Consider finding a second-hand dresser at a thrift store or garage sale. With a little creativity and effort, you can customize it to fit your personal style. This kind of project not only saves money but also reduces waste, making it a win-win for your wallet and the environment.
Rustic Wooden Pallet Shelf
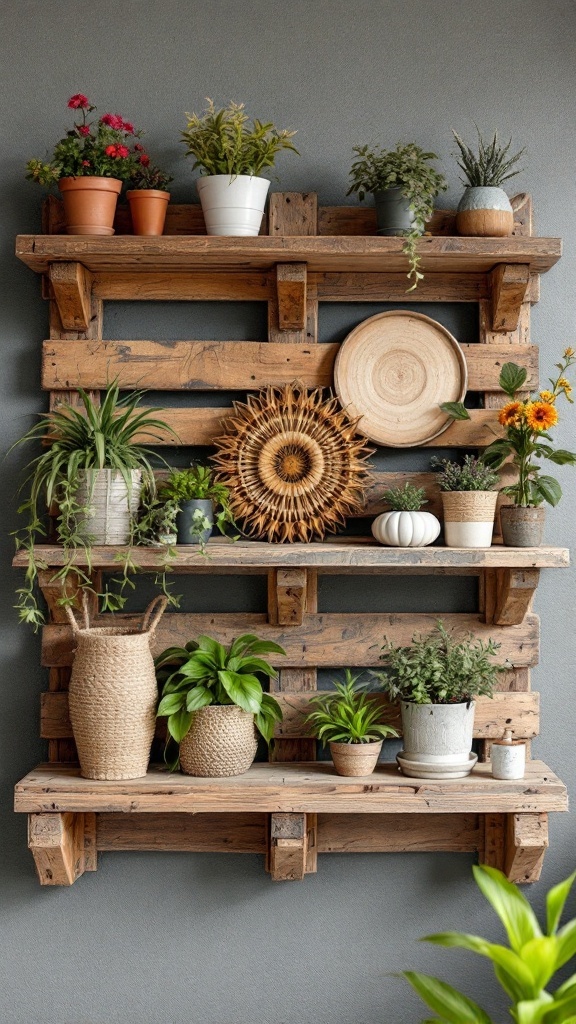
Looking for a charming way to organize your space? A rustic wooden pallet shelf might be just what you need! This shelf combines function and style, offering a perfect spot for your favorite plants and decorative items.
The image shows a beautifully arranged wooden pallet shelf, featuring a mix of potted plants and decorative pieces. The natural wood texture adds a warm touch, making it an inviting focal point in any room. This DIY project is not only budget-friendly but also a fun way to showcase your creativity.
To create your own, find a sturdy wooden pallet and clean it up. You can leave it raw for a natural look or paint it to match your decor. Once it’s ready, secure it to your wall, and arrange your plants and decor items to personalize it. It’s an easy way to add character to your space without breaking the bank!
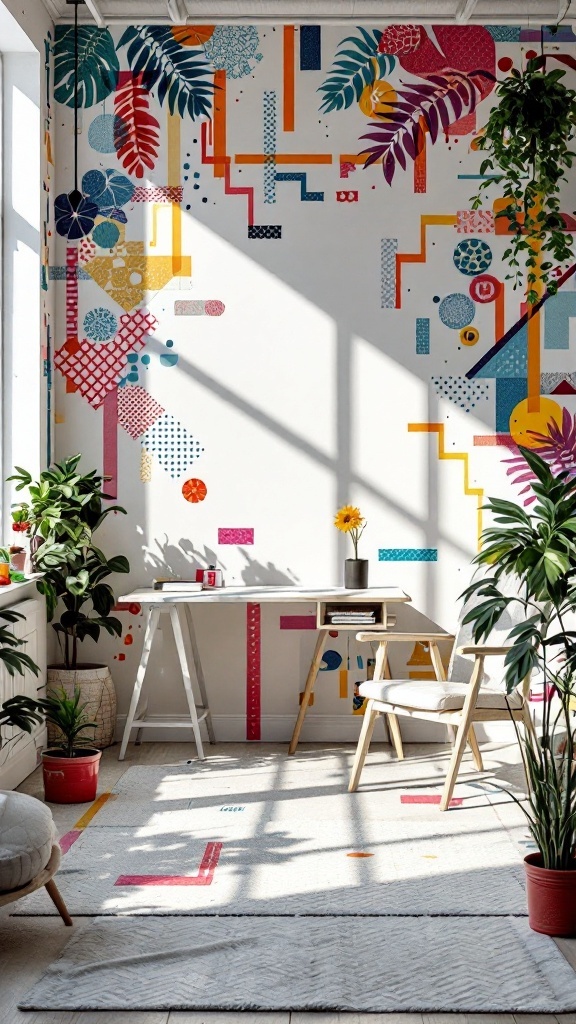
Hand-Painted Accent Wall
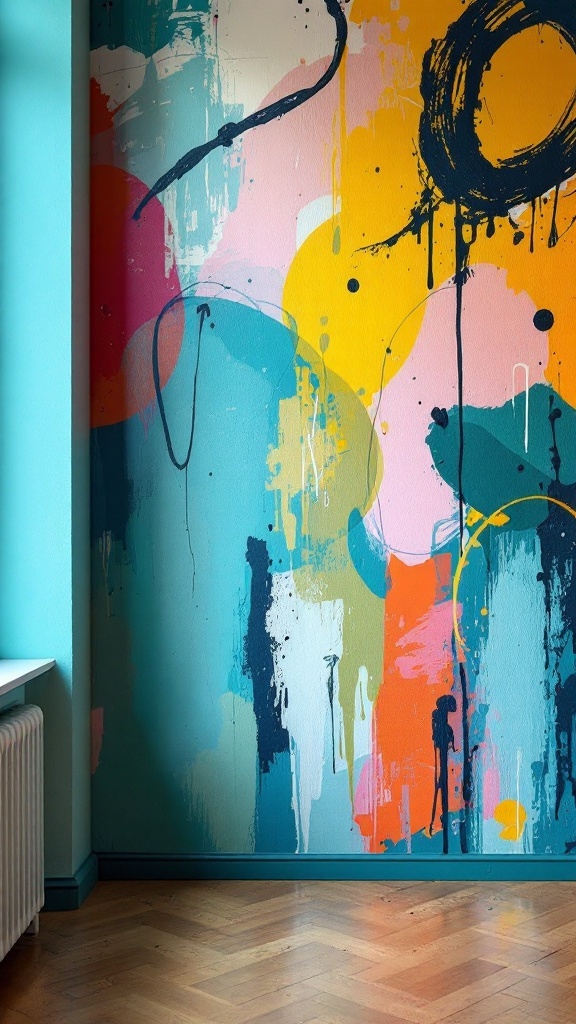
If you want to spice up your room without breaking the bank, a hand-painted accent wall is a fun and creative option. This DIY project lets you express your personality and style, making your space feel uniquely yours.
The image shows a vibrant wall filled with splashes of color, from bold yellows and greens to soft pastels. It’s a great example of how a few strokes of paint can transform an ordinary wall into a lively focal point. You can choose colors that complement your decor or go for a mix that pops!
To create your own hand-painted accent wall, start by selecting a color palette that fits your vibe. You’ll need paint, brushes, and a bit of painter’s tape to get clean lines. Don’t stress about perfection; the beauty of this style lies in its spontaneity. Just have fun with it!
Once you finish, step back and admire your handiwork. You’ll be amazed at how a simple DIY project can refresh your space and boost your mood!
Colorful Washi Tape Decor
Washi tape is a delightful way to add pops of color and personality to your room without breaking the bank. The image showcases a vibrant wall adorned with various shapes and patterns created using washi tape. This DIY project is not just affordable; it’s also super fun!
Imagine transforming a plain wall into a playful canvas filled with your favorite colors and designs. The patterns here include geometric shapes, leaves, and dots, each adding a unique touch. Using washi tape means you can easily change your design whenever you’re in the mood for something fresh.
In this space, the combination of colorful decor and greenery creates a lively atmosphere. The plants complement the bright colors, bringing warmth and life to the room. It’s a space where creativity thrives, making it ideal for work or relaxation.
So, gather your washi tape, plan your design, and let your imagination run wild! You can create anything from simple stripes to intricate patterns. Not only is this a budget-friendly solution, but it also gives you a chance to express your style.
DIY Macrame Wall Hanging
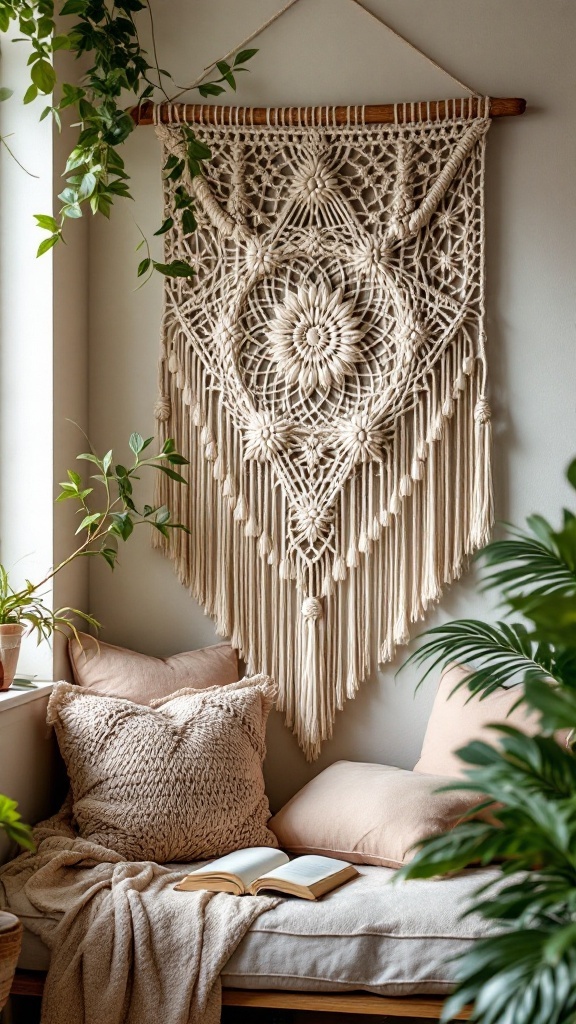
Creating a macrame wall hanging is a fun and budget-friendly way to add a touch of style to your room. This beautiful piece in the image showcases intricate knot patterns and a charming design that can easily enhance any space.
To make your own, start with macrame cord and a wooden dowel. Select a pattern you like; there are plenty of tutorials online. Once you have your materials, cut the cord to equal lengths and start knotting. It’s a relaxing activity that lets you express your creativity!
The finished product not only serves as a stunning focal point but also brings a cozy vibe. Pair it with some plants or soft cushions, like the ones shown in the image, to create a warm, inviting corner in your home.
Whimsical Fairy Light Canopy
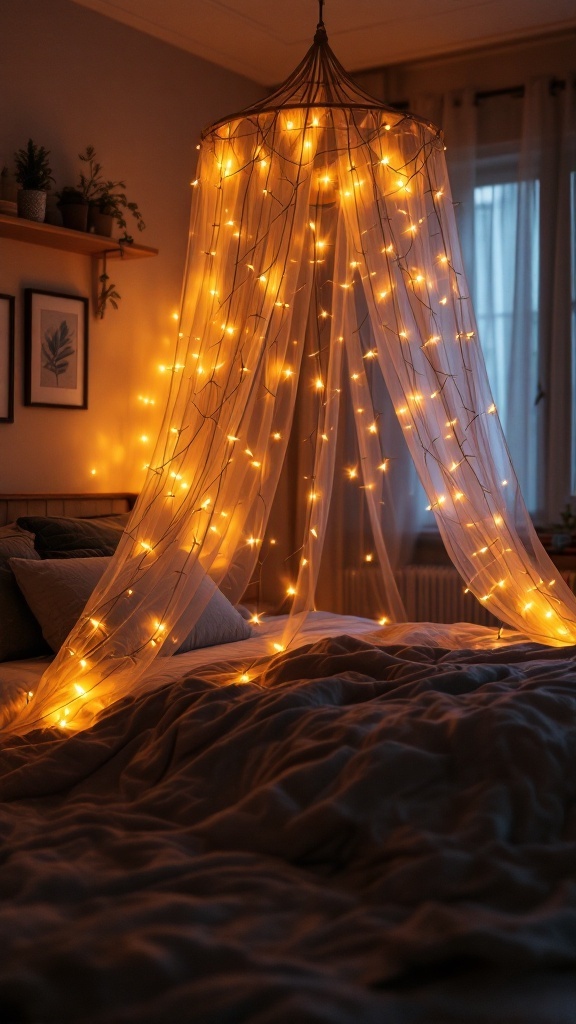
Creating a whimsical fairy light canopy can be a delightful addition to any room. This dreamy setup transforms a bedroom into a cozy retreat. The image shows a canopy draped with soft, glowing fairy lights that create a warm atmosphere.
To make your own canopy, start by gathering some sheer fabric and string lights. Hang the fabric from a frame or a sturdy ceiling hook, allowing it to flow down gently. Then, weave the lights through the fabric or let them hang freely. This simple DIY project adds charm and character to your space.
Not only does this canopy look stunning, but it also offers a calming effect. You can use it as a reading nook or a cozy spot to relax. Plus, it’s budget-friendly, making it a perfect weekend project!
Personalized Photo Collage
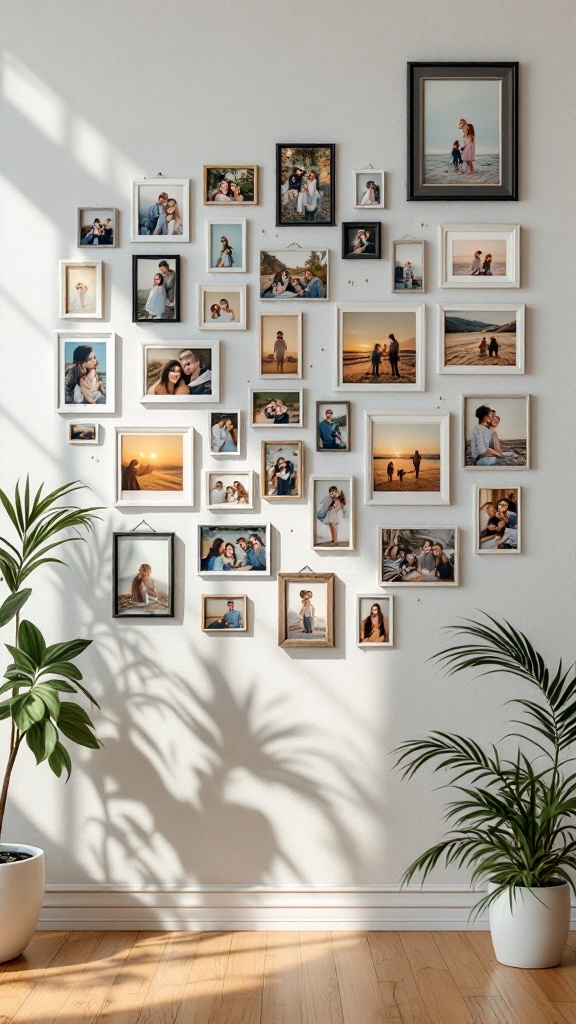
A personalized photo collage is a fantastic way to showcase your favorite memories. The image captures a beautiful arrangement of framed photos on a light wall, casting lovely shadows that add depth to the display. Each frame holds moments with friends, family, and experiences that tell your unique story.
Creating your own collage is simple and affordable. Start by gathering your favorite photos. You can print them in various sizes to add interest. Choose a mix of frames—some in classic white and others in black—to keep it visually appealing.
Once you have your photos and frames ready, lay them out on the floor before hanging. This helps you visualize the arrangement and make adjustments. You can create a structured grid or a more organic layout, depending on your style.
Use nails or adhesive strips to hang the frames, ensuring they’re secure. A personalized collage not only brightens up your space but also sparks joy every time you see it. It’s a budget-friendly DIY project that makes any room feel cozier.
Chic String Photo Display
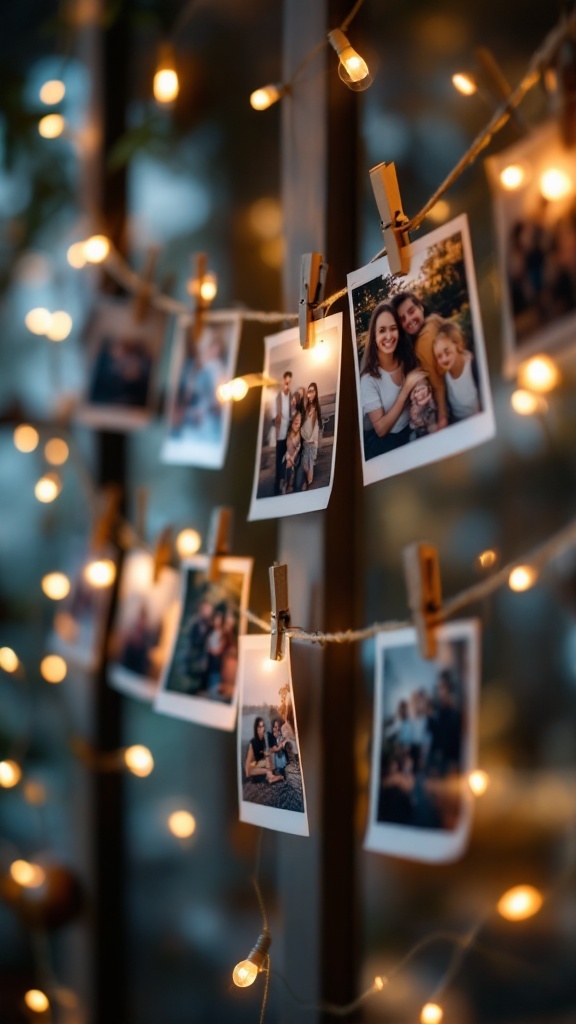
A string photo display adds a personal touch to any room. Imagine your favorite memories hanging beautifully on a line, illuminated by soft lights. This setup not only showcases your cherished moments but also acts as a piece of art.
In the image, you can see a lovely arrangement of photos clipped to a string. The warm glow of the fairy lights brings everything together, creating a cozy and inviting atmosphere. It’s the perfect mix of nostalgia and style.
To create a similar display, all you need are some string lights, a length of twine, and your favorite photos. Use small clothespins to hang the pictures, and wrap the twine around a wall or window frame. It’s a simple, budget-friendly project that transforms your space!
DIY Fabric Wall Art
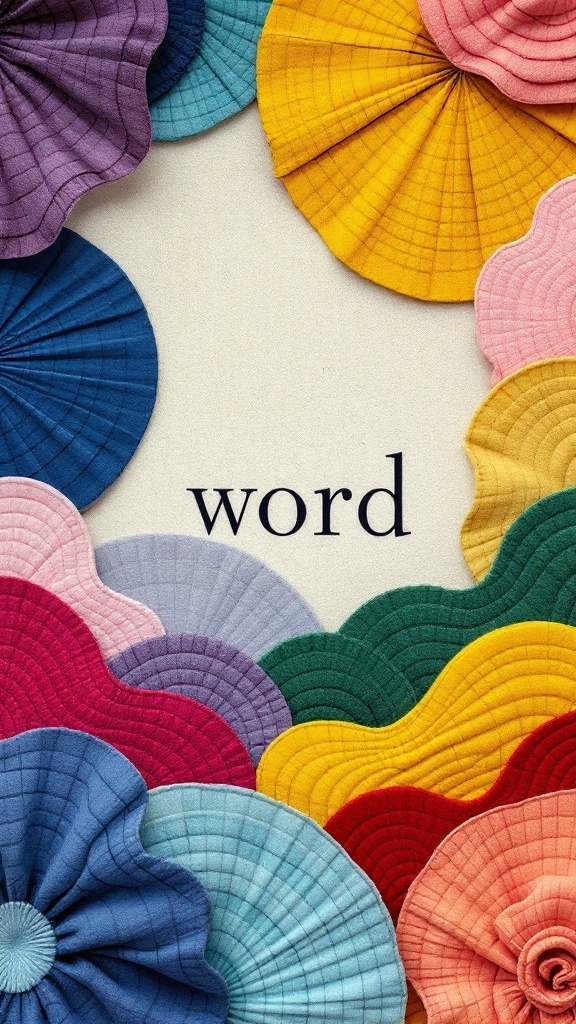
Fabric wall art is a fun and creative way to personalize your space without breaking the bank. The image shows a colorful arrangement of folded fabric pieces that create a striking visual display. Each piece is uniquely shaped and layered, adding texture and depth to the overall design.
To create your own fabric wall art, start by choosing a variety of fabrics in different colors and patterns. You can use old clothing, scraps from projects, or fabric remnants from a craft store. Cut the fabric into shapes you like; circles, flowers, or even abstract forms work well.
Next, arrange the fabric pieces on a canvas or directly on your wall. Play around with the layout until you find a design that speaks to you. Then, secure the fabric using fabric glue or staples. If you’re feeling extra creative, you can add embellishments like buttons or beads for a personalized touch.
This project allows you to express your style while creating a vibrant focal point in your room. Plus, it’s a budget-friendly way to add color and character to any space!


